

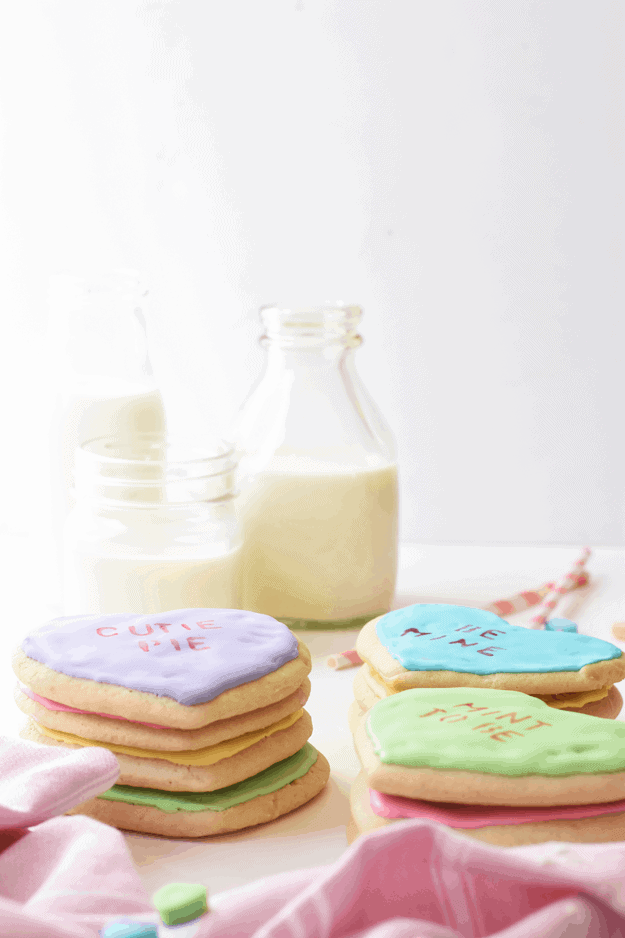
One of the most fun Valentine's Day candies are the boxes of conversation hearts. I love the cheeky and oftentimes funny messages they print on each candy. But I don't love the taste after two bites, so I thought I'd show you how to make conversation heart cookies instead! Because we can all eat at least two of these.

How to Make Conversation Heart Cookies
I'll have you know I've diligently searched for a legitimate looking conversation heart cookie, but wasn't satisfied with the results. I don't do the whole writing with icing thing, and I wanted it to have that stamped, mechanical look. So, I've devised an insanely easy way to get real-looking conversation hearts! All you need is this stencil set, this food paint brush set, and edible food paint. (Which is essentially a raspberry or lemon extract and red color dust.)
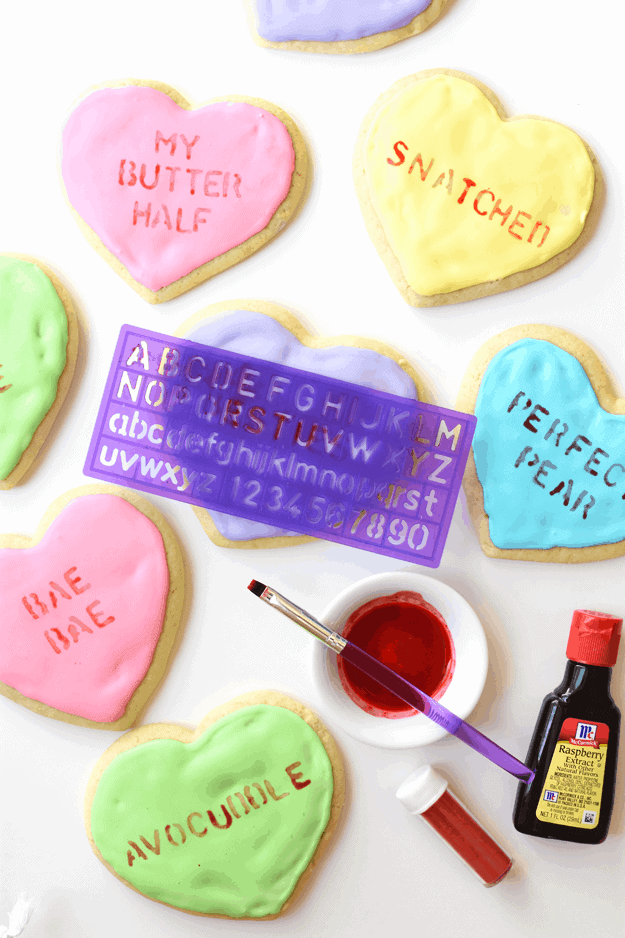
Also, you have to use royal icing to get a smooth painting surface-my royal icing is tasty, and the cookies still taste doughy and chewy!
As for this sugar cookie recipe, it's my mom's and I use it for EVERYTHING. These cookies are thick and taste almost like a shortbread cookie. The biggest piece of advice on making these is to make sure you don't overbake them! They need to be light and doughy looking when you pull them out of the oven. That might be scary to some of you who love a good golden edge. But, oh, are they chewy and delightful when cooled!

You guys ready for the step by step instructions on how to make conversation heart cookies? Your kids' hearts are gonna skip a beat when they see how cute these are!

Grab the recipe below and enjoy!
📖 Recipe

How to Make Conversation Heart Cookies
Ingredients
Sugar Cookies:
- ½ cup butter softened
- 1 cup granulated sugar
- 2 large eggs
- 1 teaspoon vanilla
- 2 ½-3 cups all-purpose flour
- 1 teaspoon baking powder
- ½ teaspoon baking soda
- ½ teaspoon salt
- ½ cup sour cream
Royal Icing:
- 3 large egg whites
- 1 teaspoon vanilla extract
- 4 cups powdered sugar
- Gel food dye
Red Food Paint:
- ½ tablespoon raspberry extract
- ½ teaspoon red color dust
Instructions
- In a stand mixer, thoroughly mix together butter, sugar, eggs, and vanilla. In a separate bowl, blend dry ingredients together. Sift the dry ingredients into the wet sugar mixture alternately with the sour cream. Dough should pull from the sides of the bowl, but still be a bit sticky to the touch.
- Form dough into a large ball and flatten into a disc between two sheets of parchment or wax paper. Roll out to ¼″ thickness. Place the sheet of rolled dough onto a baking sheet, still keeping it between the pieces of parchment. Cover and chill in the refrigerator for at least 30 minutes. (This helps the dough keep it’s shape when cutting out shapes and baking.) Remove when ready to make cut-outs.
- Heat oven to 425°F. Cut out shapes with a large heart cookie cutter. Place hearts on a parchment-lined baking sheet and bake at 425°F for 5-6 minutes. Remove from oven, and allow them to cool for about 10-15 minutes before frosting.
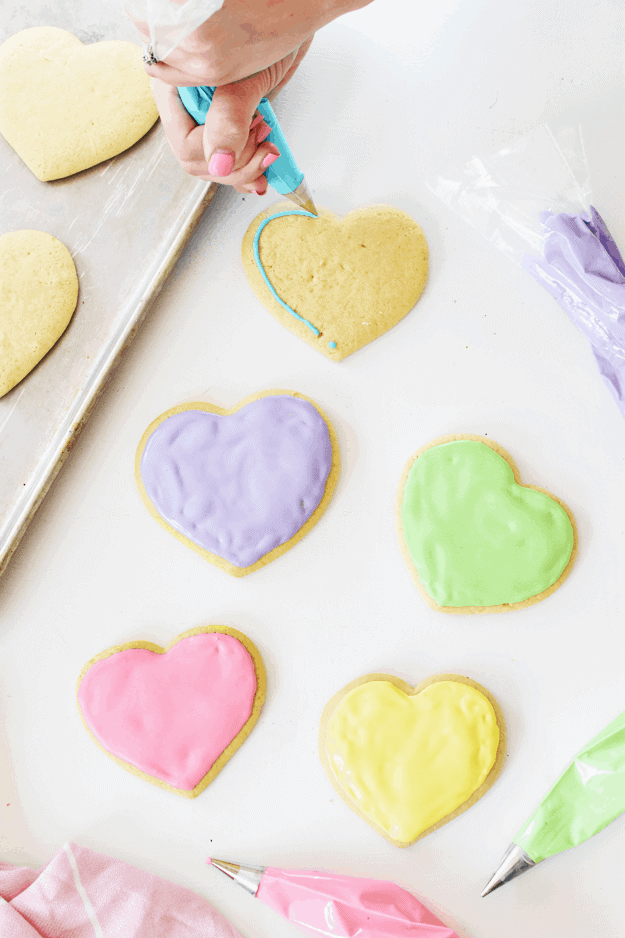
- While cookies cool, prepare the royal icing. In a mixing bowl, whisk egg whites and vanilla extract with an electric mixer on low speed, until foamy. Slowly add in powdered sugar until the shiny and stiff peaks form. Divide icing into separate bowls for pink, yellow, green, blue, and violet icing colors. Mix in a pea-sized amount of gel food dye until blended. Pour each color into separate piping bags, each fitted with a #2 round icing tip. Create an icing outline on the sugar cookies first. Let set for about 5 minutes, then flood the middle with icing until completely filled and smooth. Let icing set for at least 2 hours until firm.
- Mix together the raspberry extract and luster dust until it forms a vibrant, thick paint. Place stencil on each cookie, and lightly dab a small food paint brush into the pigment. Lightly dab the stencil outline. Allow each letter to dry before moving onto another. If you mess up, just use a wet paper towel to wipe off and start again. Once all messages are painted on, let them dry for 15 minutes, then serve! Enjoy!
Nutrition
SaveSave
Comments
No Comments